Although it’s true that the creation of highly interactive applications requires a hefty reliance on event handling, the thought of writing event-handling code on a large scale while dealing with the browser differences would be enough to daunt even the most intrepid of page authors.
You could hide the differences behind an API that abstracts the differences away from your page code, but why bother when jQuery has already done it for you?
jQuery’s event model implementation, which we’ll refer to informally as the jQuery Event Model, exhibits the following features:
- Provides a unified method for establishing event handlers
- Allows multiple handlers for each event type on each element
- Uses standard event-type names: for example, click or mouseover
- Passes the Event instance as the first argument of the handlers
- Normalizes the Event instance for the most-often-used properties
- Provides unified methods for event canceling and default action blocking
With the notable exception of support for a capture phase, the feature set of the jQuery Event Model closely resembles that of the DOM Level 2 Event Model while supporting both standards-compliant browsers and older versions of Internet Explorer with a single API. The omission of the capture phase shouldn’t be an issue for the vast majority of page authors who never use it (or even know it exists) due to its lack of support in older IE. But is it really that simple? Let’s find out.
Attaching event handlers with jQuery
Using the jQuery Event Model, you can attach event handlers to DOM elements with the on() method. So far, you’ve seen how to attach one or more handlers to a single element, but one of the advantages of using jQuery is that you can use its powerful jQuery() method to retrieve a set of elements and then attach the same handler to all of them in one statement. Consider the following simple example:
$('img').on('click', function(event) {
   alert('Hi there!');
});
This statement binds the supplied inline anonymous function as the click event handler for every image on a page. The full syntax of the on() method is as follows.
| Method syntax: on | |
|---|---|
| on(eventType[, selector][, data], handler) on(eventsHash[, selector][, data]) | |
| Attaches an event handler function for one or more events to the selected elements. | |
| Parameters | |
| eventType | (String) Specifies the name of the event type or types (a complete list can be found in table 6.1) for which the handler is to be established. Multiple event types can be specified by separating them with a space. These event types can be namespaced using a string as a suffix of the event name preceded by a period character (for example, click.myapp). Multiple namespaces are allowed (for example, click.myapp.mymodule). |
| selector | (String) An optional selector string used for event delegation to filter the descendants of the selected elements that trigger the event. If the selector is omitted, the event is always triggered when it reaches the selected element. |
| data | (Any) Data to be passed to the Event instance as a property named data and made available to the handler function. |
| handler | (Function) The function that’s to be established as the event handler. When invoked, it will be passed the Event instance as its first argument, and its function context (this) is set to the current element of the bubble phase. The value false is also allowed as a shorthand for a function that does return false;. The function can also receive additional parameters through the use of trigger() or triggerHandler() (discussed later in this lesson). |
| eventsHash | (Object) A JavaScript object that allows handlers for multiple event types to be established in a single call. The property names identify the event type (same as would be used for the eventType parameter), and the property value provides the handler. |
| Returns | |
| The jQuery collection. | |
jQuery 3: Signature improved
jQuery 3 allows the handler parameter to be an object. At the time of this writing there aren’t many details about this improvement, but don’t worry: this isn’t a common use case. If you want to learn more about this feature, you can take a look at the related issue on.
Before delving into a more detailed discussion of this crucial jQuery method, let’s put a basic example into action. Taking the code of listing 6.3 and converting it from the DOM Level 2 Event Model to the jQuery Event Model, you end up with the code shown in the next listing, which you can find in the file lesson-6/jquery.events.html.
Listing 6.5. Establishing advanced event handlers without browser-specific code
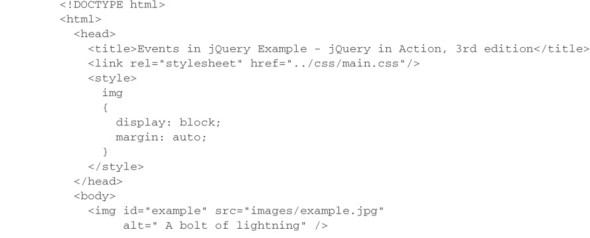
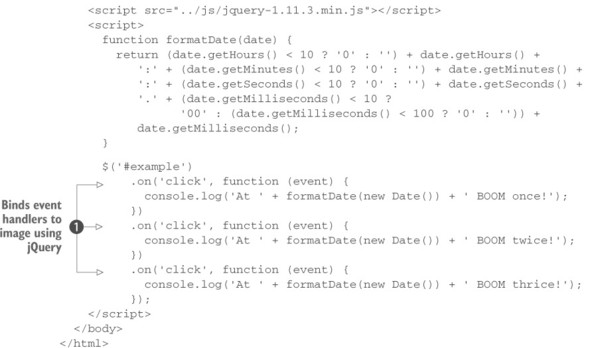
The changes to this code, limited to how you attached the event handlers ![]() , are simple but important. You create a set consisting of the target img element and invoke the on() method three times on it—remember, jQuery chaining lets you apply multiple methods in a single statement—each of which establishes a click event handler on the element.
, are simple but important. You create a set consisting of the target img element and invoke the on() method three times on it—remember, jQuery chaining lets you apply multiple methods in a single statement—each of which establishes a click event handler on the element.
Loading this page into any browser supported by jQuery (you can finally forget the standards-compliant browser story!) and clicking the image results in the display shown in figure 6.6, which, not surprisingly, is the exact same result you saw in figure 6.3.
Figure 6.6. Using the jQuery Event Model allows you to specify multiple event handlers just like the DOM Level 2 Event Model.
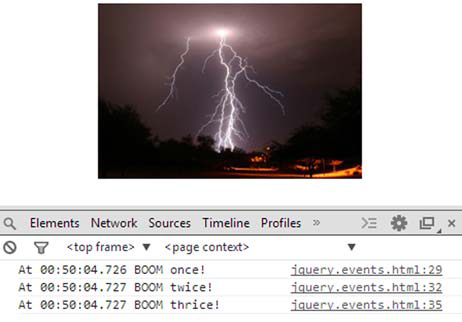
This code also works in older versions of Internet Explorer (the specific versions depend on the jQuery version used), which wasn’t possible using the code from listing 6.3 without adding browser-specific testing and branching code to use the correct event model for the current browser.
It’s worth noting that, unlike other jQuery methods, the selector parameter isn’t used at the time the on() method is called to further filter the objects in the jQuery collection that will receive the event handler. It’s used at the time the event happens to determine whether or not the event handler is called. This concept will be clearer in a few pages where you’ll see a concrete example, so please be patient.
jQuery 3: Methods deprecated
The on() method provides a unified interface to replace jQuery’s bind(), delegate(), and live() methods. While live() was deprecated in version 1.7 and then removed in version 1.9, bind() and delegate() were still around but their use was strongly discouraged. jQuery 3 deprecates the bind() and delegate() methods, so we suggest you to stick with on() (which explains why we haven’t covered these older methods in this app).
The on() method has an important difference compared to the native methods to attach event handlers. Returning false from an event handler added using this jQuery method is the same as calling preventDefault() and stopPropagation(), whereas returning false in an event handler added using a native method is equivalent to only invoking preventDefault().
At this point, page authors who have wrestled with mountains of browser-specific event-handling code in their pages are no doubt singing “Happy Days Are Here Again” and spinning in their office chairs. Who could blame them?
Listing 6.5 shows how flexible and clever the on() method is. If you only want to pass a handler without specifying data or selector, you can do so without the need to pass null for arguments. The on() method allows you to pass the handler as the second parameter. Instead of writing
$('img').on('click', null, null, function() { ... });you can write
$('img').on('click', function() { ... });Explaining how this result is achieved is outside the scope of this app, but we strongly encourage you to read the source of the method to learn it.
In the description of the on() method you learned that the first parameter can be a list of space-separated events. An example of code that uses this variant is the following:
$('button')
    .on('click', function(event) {
       console.log('Button clicked!');
    })
    .on('mouseenter mouseleave', myFunctionHandler);
In this simple snippet, you retrieve all the <button>s in the page and attach to them three event handlers. The first one, an anonymous function, is executed when the click event is triggered. The second handler, myFunctionHandler, is a hypothetical function declared elsewhere that’s executed when either the event mouseenter or mouseleave is fired.
In the description of the signature of on(), we also highlighted how the first parameter can be a JavaScript object that we named eventsHash, where the property names identify the event type and the property value provides the handler. Using this approach, the previous code can be rewritten as follows:
$('button').on({
   click: function(event) {
      console.log('Button clicked!');
   },
   mouseenter: myFunctionHandler,
   mouseleave: myFunctionHandler
});
Which version to use is up to you, but we suggest you choose a style and stick with it.
Sometimes you may need to pass some data to the event handler. Although you can store the data in a variable and rely on closure, there are cases so simple that you can avoid this technique and use the data parameter. Let’s say that you have a handler attached to the click event of a button, and this handler prints on the console the full name of a person. You can pass the name using the data parameter as shown here:
$('#my-button').on('click', {
   name: 'John Resig'
}, function (event) {
    console.log('The name is: ' + event.data.name);
});
As demonstrated by this snippet, you access the name property of the object via the data property of the Event instance (event). In case you want to see a live demo, this example is available in the file lesson-6/on.data.parameter.html and also as a JS Bin.
So far, you’ve attached event handlers on DOM elements that are already in the HTML markup of the page. But what about elements that don’t exist yet but will?
As we’ve discussed, jQuery allows you to dynamically manipulate the DOM by adding, modifying, or deleting elements. When you throw Ajax into the mix, it’s likely that DOM elements will come into and out of existence frequently during the lifetime of the page. This is particularly true if you’re dealing with single-page applications.
The solution to this issue is called event delegation. Event delegation is an important technique that suggests that you attach the handler to a parent of the element(s) instead of the element(s) itself. Event delegation can be employed in raw JavaScript as well, but this is one of the cases where jQuery shows its power in all its greatness. Imagine that you have an empty unordered list that has been filled with five list items using an Ajax call. At the time the scripts of the page were executed, the list was still empty:
<ul id="my-list"></ul>After the Ajax call, the list resembles the following:
<ul id="my-list">
   <li>Item 1</li>
   <li>Item 2</li>
   <li>Item 3</li>
   <li>Item 4</li>
   <li>Item 5</li>
</ul>
You want to print on the console the index of a list item as soon as the mouse hovers over it. Now let’s compare how you can implement event delegation in raw JavaScript and use jQuery to achieve your goal.
Using raw JavaScript, the code to perform this task looks like the following:
document.getElementById('my-list').addEventListener('mouseover',
   function(event) {
      if (event.target.nodeName === 'LI') {
         console.log('List item: ' +
            (Array.prototype.indexOf.call(
               document.getElementById('my-list').children,
               event.target
            ) + 1)
         );
      }
   },
   false
);
Using jQuery, you can reduce it all to three lines of code (using the same code style to be fair):
$('#my-list').on('mouseover', 'li', function(event) {
    console.log('List item: ' + ($(this).index() + 1));
});
That’s clean code! Do you think all you’ve gained is fewer lines of code? No way! Did you consider that the raw JavaScript version doesn’t take into account older versions of Internet Explorer whereas jQuery does? Of course, behind the scenes jQuery performs more or less the same operations, but why worry about compatibility issues when jQuery can do it for you? At this point you should start to understand why jQuery has been so widely adopted for developing websites. In case you want to play with these snippets, you can find the raw JavaScript code in the file lesson-6/javascript.event.delegation.html and as a JS Bin. The code showing how to implement event delegation with jQuery can be found in the file lesson-6/jquery.event.delegation.html and as a JS Bin.
The advantages of event delegation aren’t limited to executing handlers for elements that don’t exist yet, though. It also allows you to save memory and time. Imagine if the Ajax call filled the list with hundreds of list items instead of just five as in our example. To attach the handler directly to the list items, you should have looped over each item (you could have used the jQuery() method, but behind the scenes it would have done nothing but iterate over each element). This task would have required a given amount of time, maybe even a few hundred milliseconds. While your loop is executing, the user interface of the browser is blocked and the user perceives poor performance. In addition, because JavaScript is a single-threaded language, no other operations can be performed while your loop is executing. It’s pretty obvious that attaching a handler to just one (parent) element requires less time. We also said that event delegation enables you to save memory. In this example, you went from having to keep in memory hundreds of handlers to just one. A big savings! When implementing event delegation, you’ll sometimes see code attached to document. Modifying our example, the jQuery code would resemble this:
$(document).on('mouseover', '#my-list li', function(event) {
    console.log('List item: ' + ($(this).index() + 1));
});
Note how you update the selector parameter to assure that you attach the handler on the same set of elements. Because of this example you may think that it’s a good idea to attach all the handlers to document, but attaching many delegated handlers to an element near the root of the DOM or to document can degrade the performance. In such cases, every time an event is fired, jQuery has to compare the provided selector parameter with the element that fired the event for every element from the event target up to the top (because of event bubbling). To avoid this issue, a good practice is to attach delegated events to an element as close as possible to those you’re targeting.
Up to this point, we’ve talked a lot about events and we’ve even used some of them. But how many are there, and what are these events? Table 6.1 lists all those that you can listen for.
Table 6.1. Events available for listening
| Events | |||
|---|---|---|---|
| blur change click dblclick error focus | focusin focusout keydown keypress keyup load | mousedown mouseenter mouseleave mousemove mouseout mouseover | mouseup ready resize scroll select submit unload |
Now that you’ve learned all about how to attach event handlers, we can discuss a variation of on() that allows you to attach a handler that has to be fired only once and then removed.
Listening for an event once
jQuery provides a specialized version of the on() method, named one(), that establishes an event handler as a one-shot deal. Once the event handler executes, it’s automatically removed. Its syntax is identical to the on() method, so we’ll omit the explanation of the parameters (if you need a refresher, you can refer to the syntax of on()).
| Method syntax: one |
|---|
| one(eventType[, selector][, data], handler) one(eventsHash[, selector][, data]) |
| Establishes a function as the event handler for the specified event type on all elements in the matched set. Once executed, the handler is automatically removed. |
| Returns |
| The jQuery collection. |
Up to this point, you’ve seen how to bind an event handler to a set of elements, but you may eventually need to remove it. Let’s see how.
Leave a Reply