There may be occasions when you want to prevent an event from bubbling any further up the DOM tree. This might be because you’re fastidious and you know that you’ve already accomplished any processing necessary to handle the event, or you may want to forestall unwanted handling that might occur higher up in the chain.
Regardless of the reason, you can prevent an event from propagating any higher via mechanisms provided on the Event instance. In modern browsers, you can call the stopPropagation() method of the Event instance to halt the propagation of the event farther up the ancestor hierarchy. In older versions of Internet Explorer, you have to set a property named cancelBubble to true in the Event instance. Interestingly, many modern standards-compliant browsers support the cancelBubble mechanism even though it’s not part of any W3C standard.
Some events have default semantics associated with them. For example, a click event on an anchor element will cause the browser to navigate to the element’s href, and a submit event on a form element will cause the form to be submitted. Should you wish to cancel these semantic actions—usually referred as the default actions—of the event, in modern browsers you can call the preventDefault() method of the Event instance. In older versions of Internet Explorer, the method doesn’t exist, so you have to set a property called returnValue to false. Alternatively, within the event handler you can achieve the same result by returning false. Sometimes you may also need to stop the propagation and the default action.
A frequent use for such an action is in the realm of form validation. In the handler for the form’s submit event, you can make validation checks on the form’s controls and return false if any problems with the data entry are detected.
You may also have seen the following on form elements:
<form name="myForm" onsubmit="return false;" ...This effectively prevents the form from being submitted in any circumstances except under script control (via form.submit(), which doesn’t trigger a submit event).
Under the DOM Level 0 Event Model, almost every step you take in an event handler involves using browser-specific detection in order to figure out what action to take. What a headache! But don’t put away the aspirin yet—it doesn’t get any easier when you consider the more advanced event model.
The DOM Level 2 Event Model
One severe shortcoming of the DOM Level 0 Event Model is that only one event handler per element can be registered for any specific event type at a time. This happens because a property is used to store a reference to a function that’s to serve as an event handler. If you have two things that you want to do when an element is clicked, the following statements won’t let that happen:
someElement.onclick = function doFirstThing() {};
someElement.onclick = function doSecondThing() {};
Because the second assignment replaces the previous value of the onclick property, only doSecondThing() is invoked when the event is triggered. Sure, you could wrap the two functions in another function that calls both, but as pages get more complicated it becomes increasingly difficult to keep track of such things. Moreover, if you use multiple reusable components or libraries in a page, they may have no idea of the event-handling needs of the other components. The code that somebody else has written might be trying to set the someElement.onclick property as well, and either this click handler or yours is going to be overwritten. You could employ other solutions, but all of these add complexity to pages that are likely to already be complex enough.
The establishment of a standard event model, the DOM Level 2 Event Model, was designed to address these types of problems. Let’s see how event handlers, even multiple ones, are established on DOM elements under this more advanced model.
Establishing event handlers
Rather than assigning a function reference to an element property, DOM Level 2 event handlers are established via an element method. Each DOM element defines a method named addEventListener() that’s used to attach event listeners to the element. The format of this method is as follows:
addEventListener(eventType, listener, useCapture)The eventType parameter is a string that identifies the type of event to be handled. These string values are, generally, the same event names you used in the DOM Level 0 Event Model without the on prefix: for example: click, mouseover, keydown, and so on.
The listener parameter is a reference to the function (or an inline, usually anonymous, function) that’s to be established as the handler for the named event type on the element. As in the basic event model, the Event instance is passed to this function as its first parameter.
The final parameter, useCapture, is a Boolean whose operation we’ll explore in a few moments, when we discuss event propagation in the Level 2 Model. For now, you’ll leave it set to false.
Now that we’ve discussed the parameters of addEventListener(), guess what? Older versions of Internet Explorer have their own way of attaching handlers! We’ll delve into the details of the Internet Explorer way in section 6.1.3, “The Internet Explorer Event Model.”
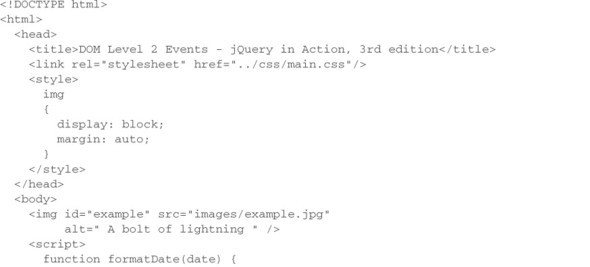
To see the method in action, you’ll once again change the example from listing 6.1 to use the more advanced event model. You’ll concentrate only on the click event type. This time you’ll establish three click event handlers on the img element. The new example code can be found in the file lesson-6/dom.2.events.html and is shown in the following listing.
Listing 6.3. Establishing event handlers with the DOM Level 2 Event Model
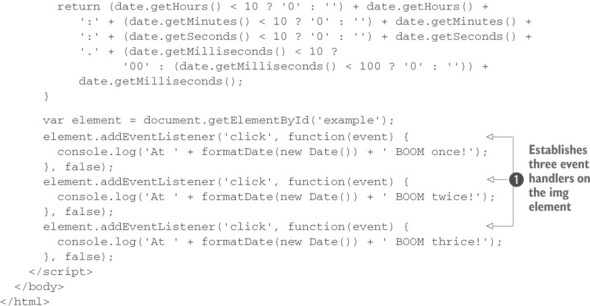
This code is simple, but it clearly shows how you can establish multiple event handlers on the same element for the same event type—something you weren’t able to do easily with the Basic Event Model. Inside the <script> tag, you grab a reference to the image element and then establish three event handlers for the click event ![]() .
.
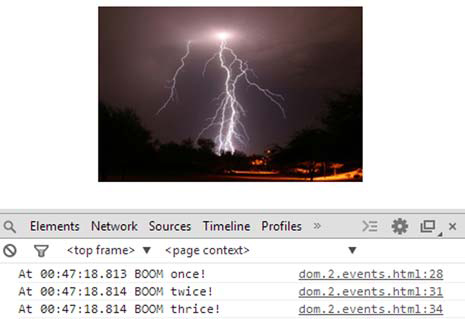
Loading this page into a standards-compliant browser (not Internet Explorer 8 and below) and clicking the image results in the display shown in figure 6.3.
Figure 6.3. Clicking the image once demonstrates that all three handlers established for the click event are triggered.
Now that we’ve shown this very useful feature, you’ll find out what’s up with that useCapture parameter.
Leave a Reply