The first thing you need to do when using virtually any jQuery method is to select some document elements to act upon. As you learned in lesson 1, to select elements in a page using jQuery, you need to pass the selector to the jQuery() function (or its alias $()). The jQuery() function and its alias return a jQuery object containing a set of DOM elements that match the given criteria and also expose many of jQuery’s methods and properties.
Sometimes the set of elements you want to select will be easy to describe, such as “all paragraph elements on the page.” Other times they’ll require a more complex description like “all list elements that have the class list-element, contain a link, and are first in the list.” Fortunately, jQuery provides a robust selector syntax you can use to easily specify sets of elements elegantly and concisely. You probably already know a big chunk of the syntax. jQuery uses the CSS syntax you already know and love and extends it with some custom means to perform both common and complex selections.
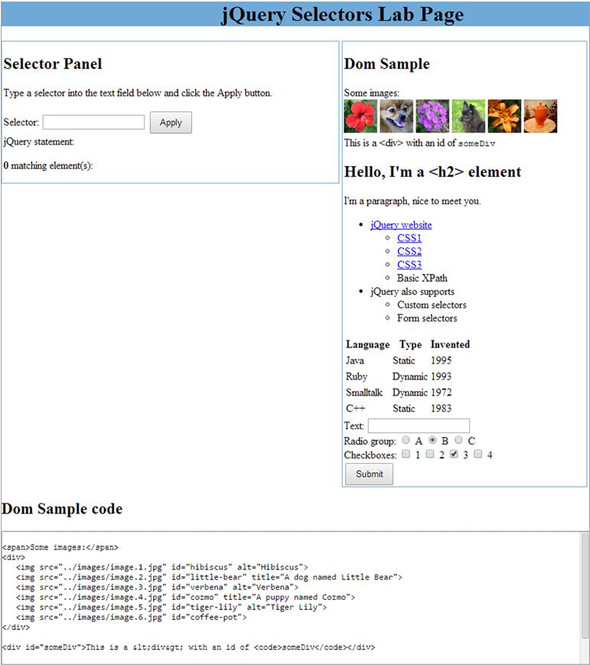
To help you learn about element selection, we’ve put together a jQuery Selectors Lab Page that’s available in the downloadable code examples for this app (in the file lesson-2/lab.selectors.html). The Selectors Lab allows you to enter a jQuery selector string and see (in real time!) which DOM elements get selected. When displayed, the lab should look as shown in figure 2.1.
Figure 2.1. The jQuery Selectors Lab Page allows you to observe the behavior of any selector you choose in real time.

Tip
If you haven’t yet downloaded the example code, you really ought to do so now—the information in this lesson will be much easier to absorb if you follow along with the lab exercises.
The Selector Panel at the top left contains a text box and a button. To run a lab “experiment,” type a selector into the text box and click the Apply button. Go ahead and type the string li into the box and click Apply.
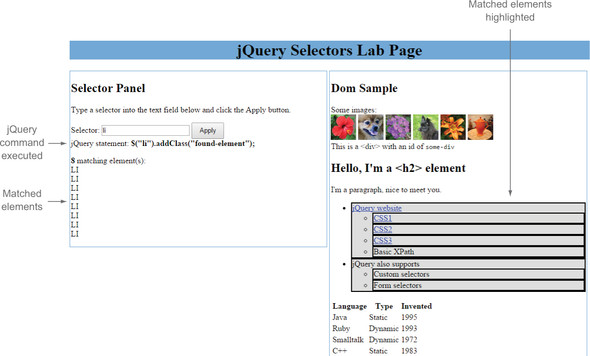
The selector that you type (in this case li) is applied to the HTML fragment loaded into the DOM Sample pane at the upper right. The lab code that executes when you click Apply adds a class named found-element to all the matching elements. A CSS declaration defined for the page causes all elements with that class to be highlighted with a black border and gray background. After clicking Apply, you should see the display shown in figure 2.2, in which all li elements in the DOM sample are highlighted. In addition, the executed jQuery statement, as well as the tag names of the selected elements, is displayed below the Selector text box. The HTML markup used to render the DOM sample fragment is displayed in the lower pane, labeled “DOM Sample Code.” This should help you experiment with writing selectors targeted at the elements in this sample.
Figure 2.2. A selector value of li matches all li elements when applied, as shown by the displayed results.
We’ll talk more about using this lab as we progress through the lesson. For the moment, let’s take a look at how jQuery deals with the basic CSS selectors.
Leave a Reply